Demos - How to guide
A Staff Member asked for my demo file, what do I need to do?
Staff Members may ask you to upload a demo file in order to investigate a rule break by you, or someone near you.
> Warning: Keep in mind that in accordance with Rule 1.6, you are REQUIRED to upload the requested file. Failure to do so may result in punishment.
A demo file is simply a recording file that the Staff Member can download and open locally. To provide this, follow these steps:
- Locate your Garry's Mod installation folder (Usually:
C:\ProgramFiles (x86)\Steam\steamapps\common\GarrysMod, though this may vary). - Go into the folder:
garrysmod\data\phdemos. - Locate the file requested by the Staff Member (Format:
perpheads_demo_XXXXXXXXXX.dem). - Upload the file to the web. You may use any reputable service (e.g., Mega, Google Drive, Dropbox).
- Copy the share link and send it to the Staff Member.
And you're all set! The Staff Member has everything they need and will likely contact you after reviewing your footage.
What are demos?
Whenever you play on the server, demos are automatically recorded. A demo essentially records everything happening around you and saves it locally. This is vital if you need to review a situation or create a report/action request, as it serves as definitive proof to protect yourself against false claims.
> Retention Rule: Demos must remain enabled at all times. Rule 1.6 states that you must keep any demo for at least 21 days.
Demos can take up storage space. However, once 21 days have passed, you are free to delete them. The option to automatically delete demo files older than 21 days can be toggled in the F1 Menu under "Automatically delete old demos?".
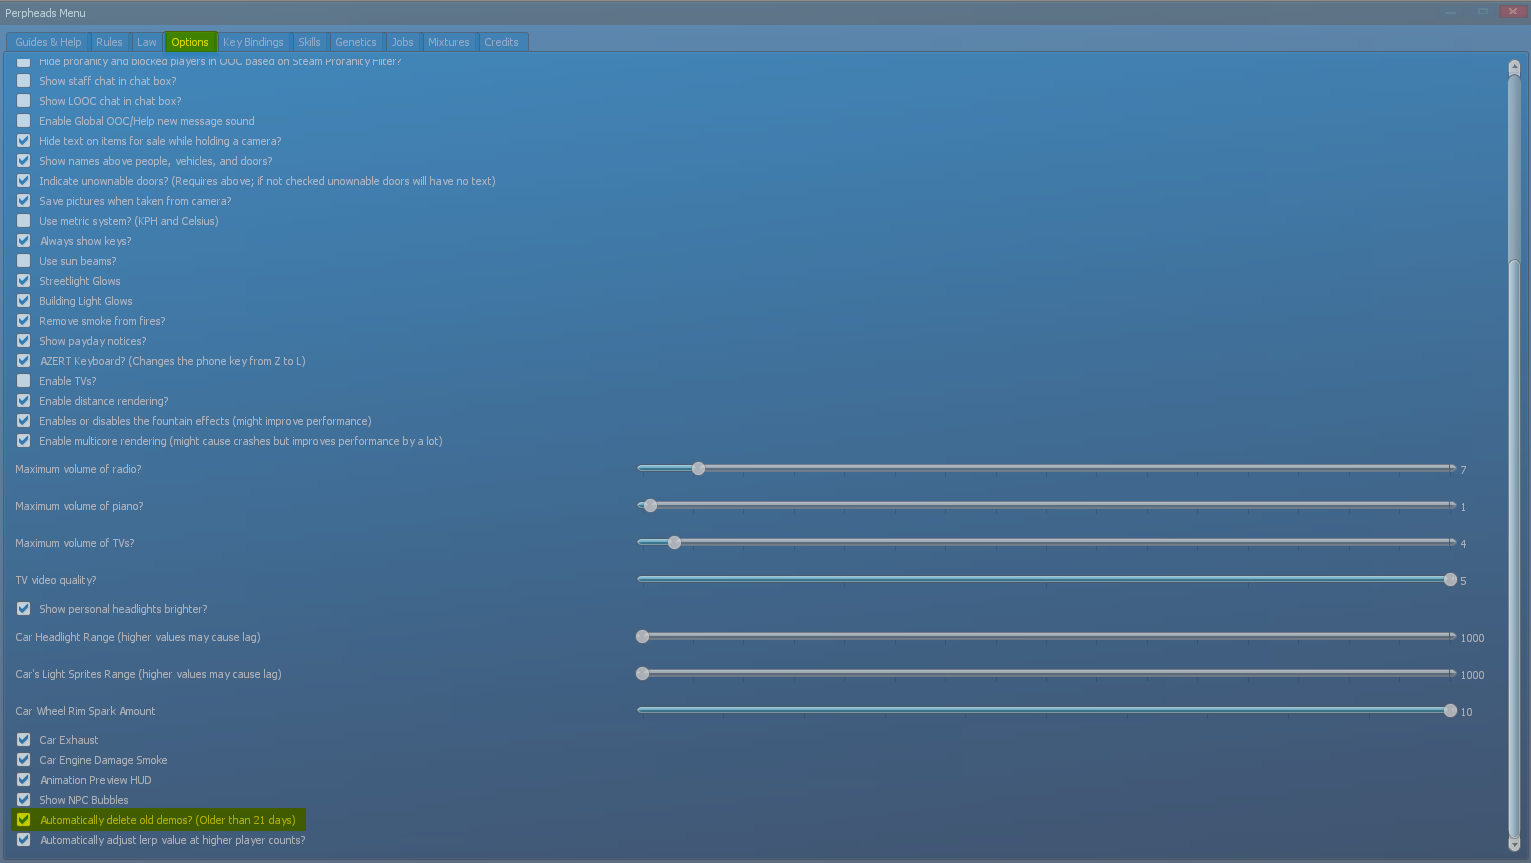
How to locate your demo files
PERPHeads saves demos to a specific location to prevent your Steam Cloud from filling up with large recordings.
To find them: 1. Right-click on Garry's Mod in your Steam Library. 2. Select Properties -> Local Files -> Browse.
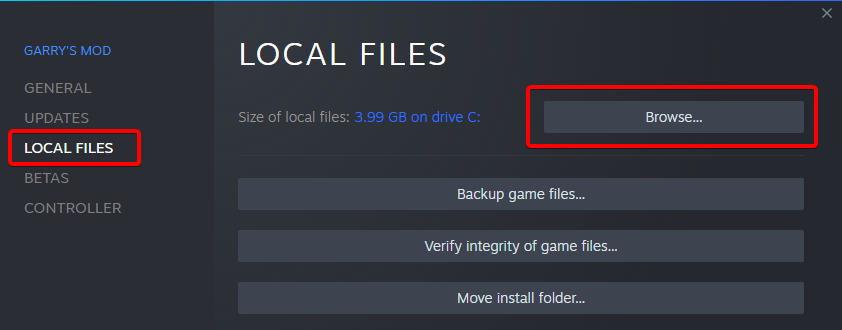
From there, navigate to: garrysmod/data/phdemos.
This folder contains your raw recordings. If you want to watch one, you must copy the file from this folder into your main garrysmod/demos folder.
How to load up a demo
Important: Prior to loading a demo, it is highly recommended that you connect to the main server (perpheads.win) first. This ensures all server content/textures are loaded, preventing errors and missing models in the demo.
- Copy the desired
.demfile fromgarrysmod/data/phdemos. - Paste it into
garrysmod/demos. - In the Garry's Mod Main Menu, go to the 'Demos' section.
- Hover over the demo of your choice and press 'Play'.
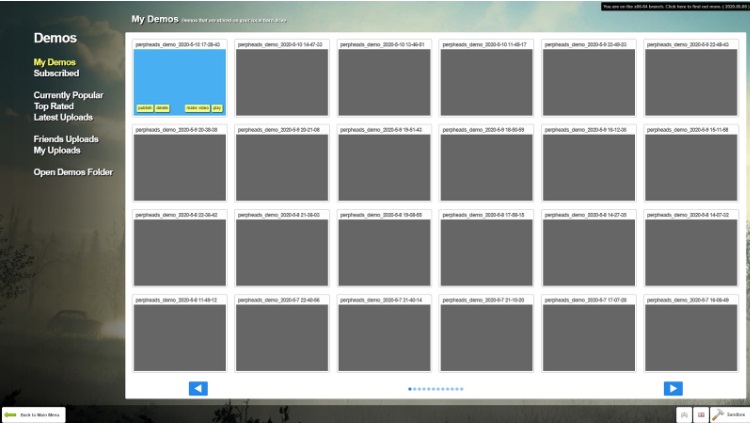
Which file is which? The title of each demo helps you identify it. Each file is formatted with the server name, date, and start time. Since demos record for a set duration before starting a new file, you will likely have multiple files per day.
If you are unsure which specific file covers a certain incident, contact a Staff Member. They can provide you with the exact filename based on the server logs.
How to stop a demo recording
You may need to manually end a recording while playing (e.g., immediately after an incident where you died, so you know the footage is at the very end of that file).
To manually end a recording:
1. Hold TAB to open the scoreboard.
2. Click the button in the top right corner: "Force Restart Demo".
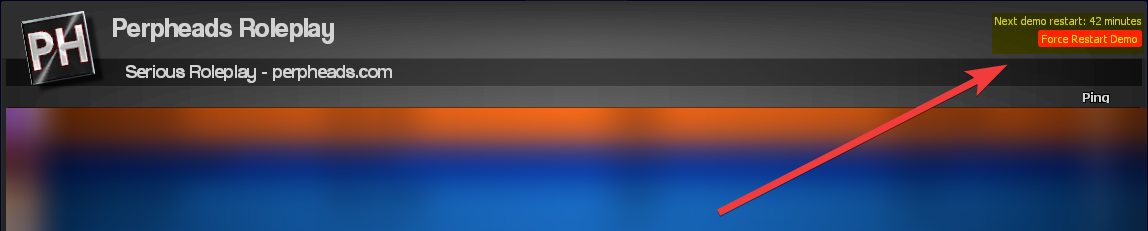
The current demo will save and stop, and a new one will automatically begin. Note: You may need to restart your game to see this new file in the menu.
Making demos provide more information (ESP)
By default, demos do not show player names, making identification difficult. However, a LUA script is available that enables "ESP" in demos, showing names and SteamIDs.
Installation Instructions:
- Go over to steam -> Library and find Garry's mod.
- Right click -> Manage -> Browse local files.
- Open garrysmod and put dem.lua inside the lua folder.
- Important: Join the PERPHeads server before playing the demo to ensure models load correctly.
- Start playing your demo.
- Open your console (
~) and type:sv_allowcslua 1;lua_openscript_cl dem.lua
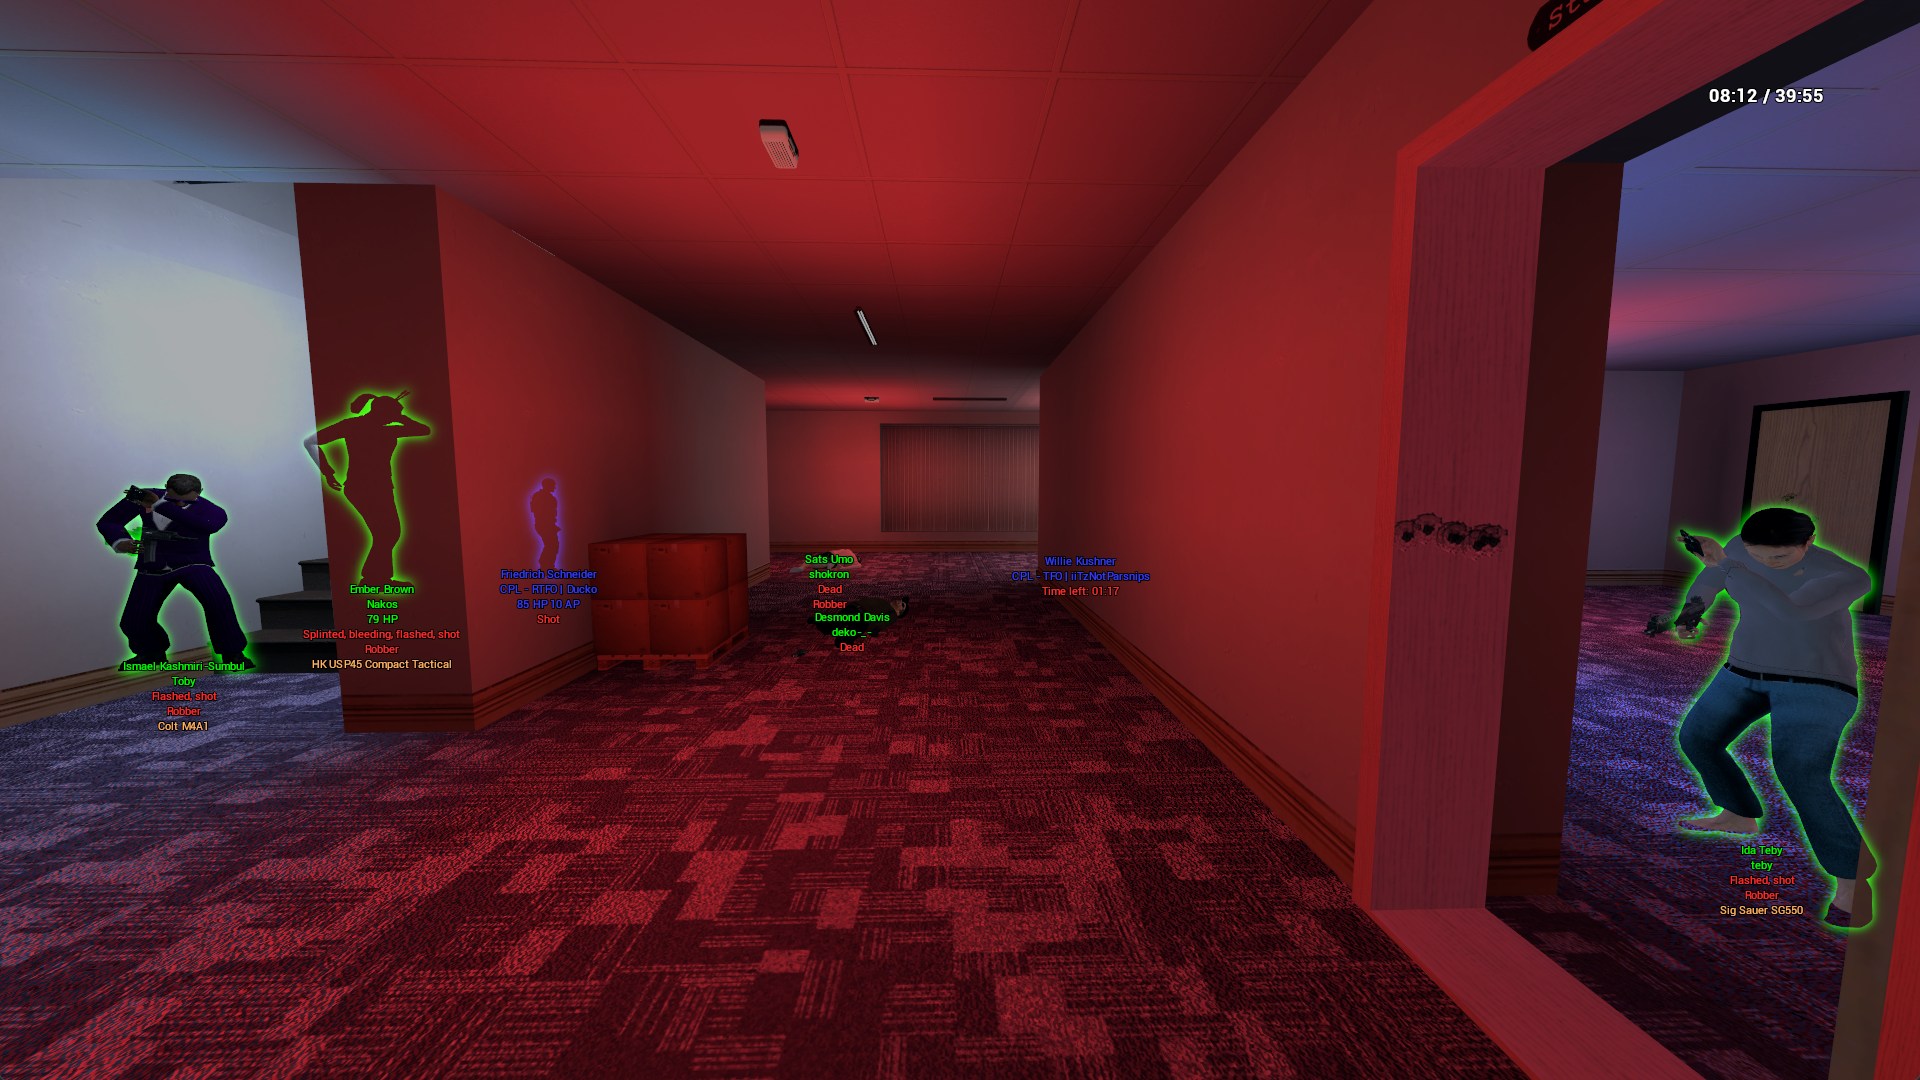
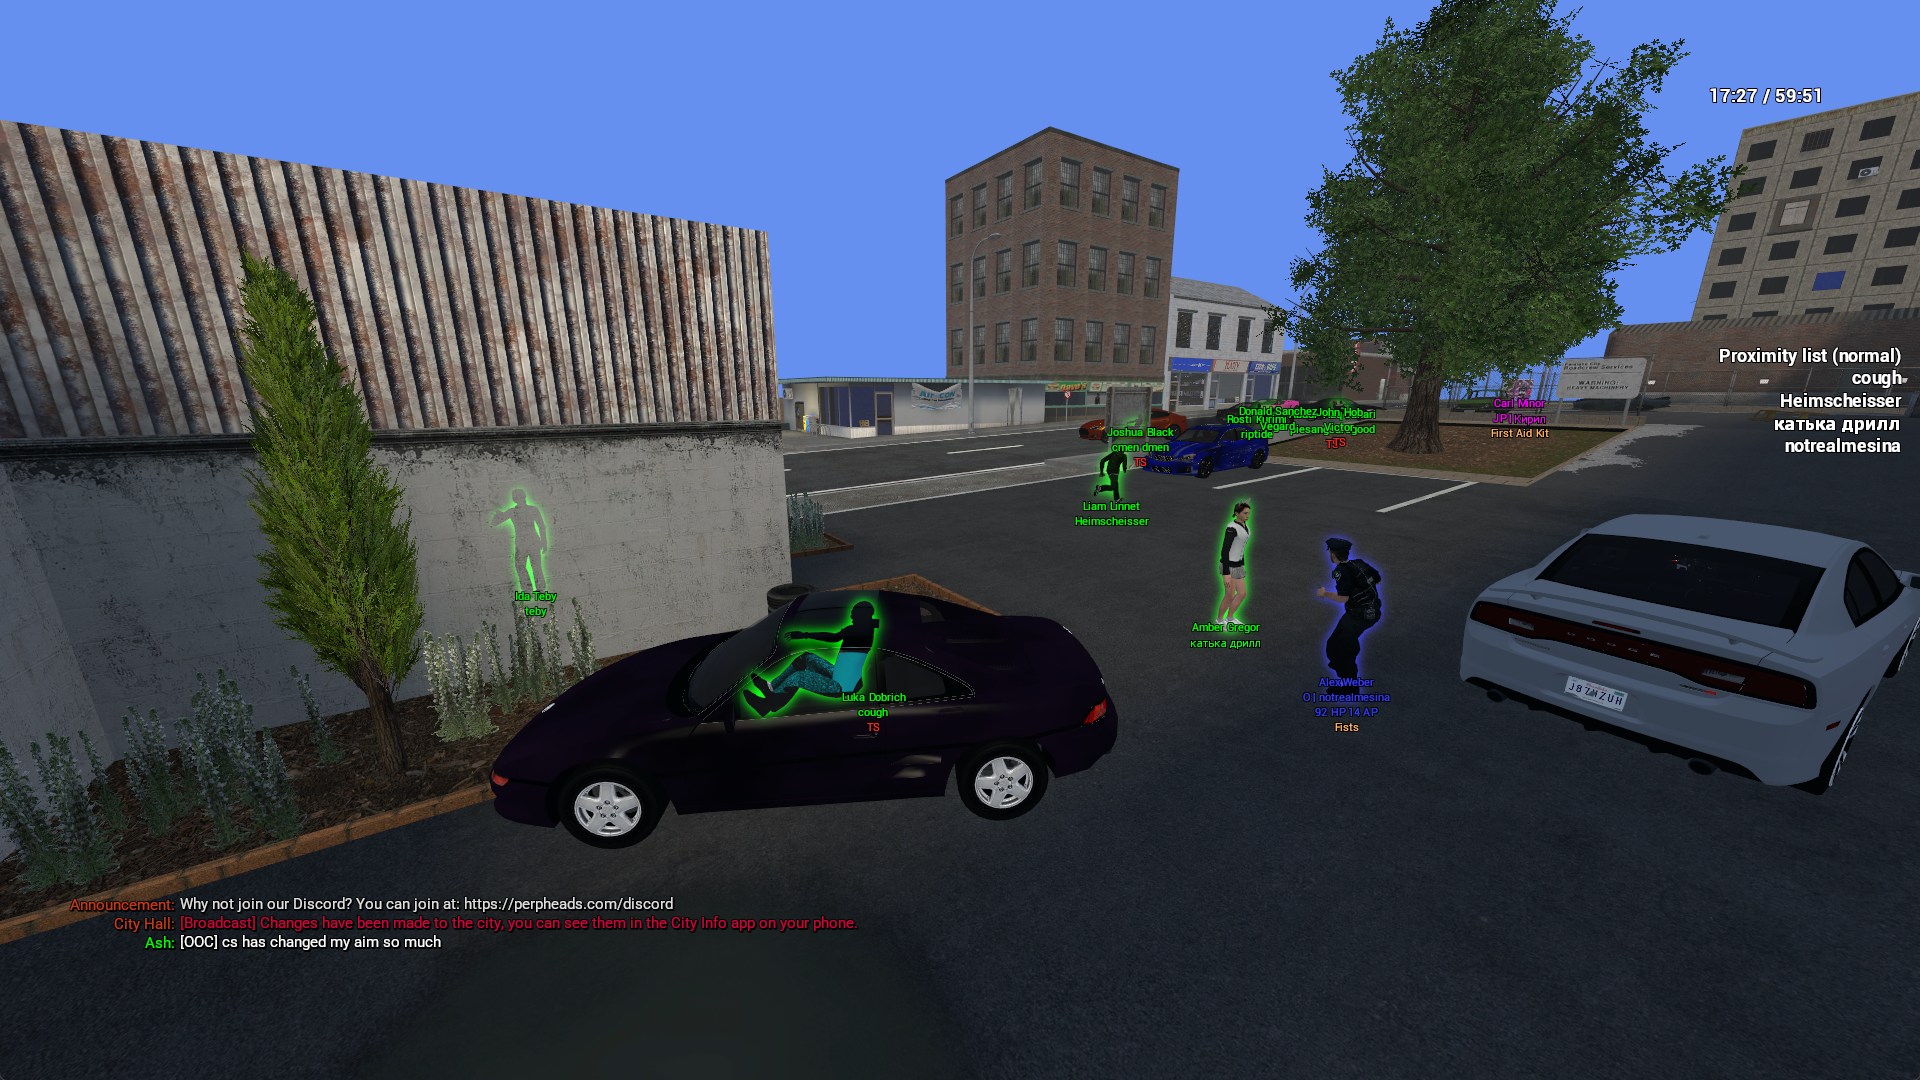
As seen in the image above, enabling dem.lua provides vital info like Steam Names, SteamIDs, and currently held weapons.
Controlling the demo Documentation
Right click to open the main menu. There will be several options including:
- A. Spectate: In the main menu, you'll be able to select nearby players. However, in the options panel, you'll be able to select all players.
- B. Console kill logs: Whenever a player kills another player, it will be printed in the console. Due to networking limitations, this feature is unreliable; sometimes it does not log kills.
- C. Voice isolation: Mutes everyone besides a specific player. Useful for when you want to hear one person in a crowd of people.
- D. Disable UIs: Prevents certain panels from showing up.
- E. Quick actions: While aiming at someone (except while spectating), you'll be able to perform a select few actions on them.
Some other features are:
- F. Thirdperson (with mouse controls)
- G. Customisable ESP
- H. Demo controls
- I. Being able to hear and see normally whilst dead
- J. Freecam out of a car
Demo-tool updatelog
Recording a demo file
To turn a demo into a video file (for YouTube/Streamable), use screen recording software.
- Use the
Gotobutton to jump to the tick where the incident starts. - Start your recording software (e.g., ShadowPlay, Radeon Software, OBS, or Medal).
- Press Resume on the demo playback.
- Stop recording when the incident is over.
If you are unable to record your screen due to hardware limitations, send the .dem file to a staff member, and they can record it for you.
Actions:
Details:
Version: 12
Created On: 9 May 2020, 10:10 p.m.
Created By: SpaceShots
Authors: SpaceShots, Hayden, Super_, flugs, curak, Maia, Tyla Jai, JuanBonita, Viper, A1L, Blitzsuo, A1L
Views: 24k